Custom Color Scheme
Info
This documentation is AI-generated. You can help improve it by submitting an Issue.
提示
If the issue remains unresolved, visit GitHub Issues to search or submit new feedback, or join QQ group 694413711 for community support.
Contributions to this tutorial are always welcome.
Simple Customization Method
Generate Color Scheme
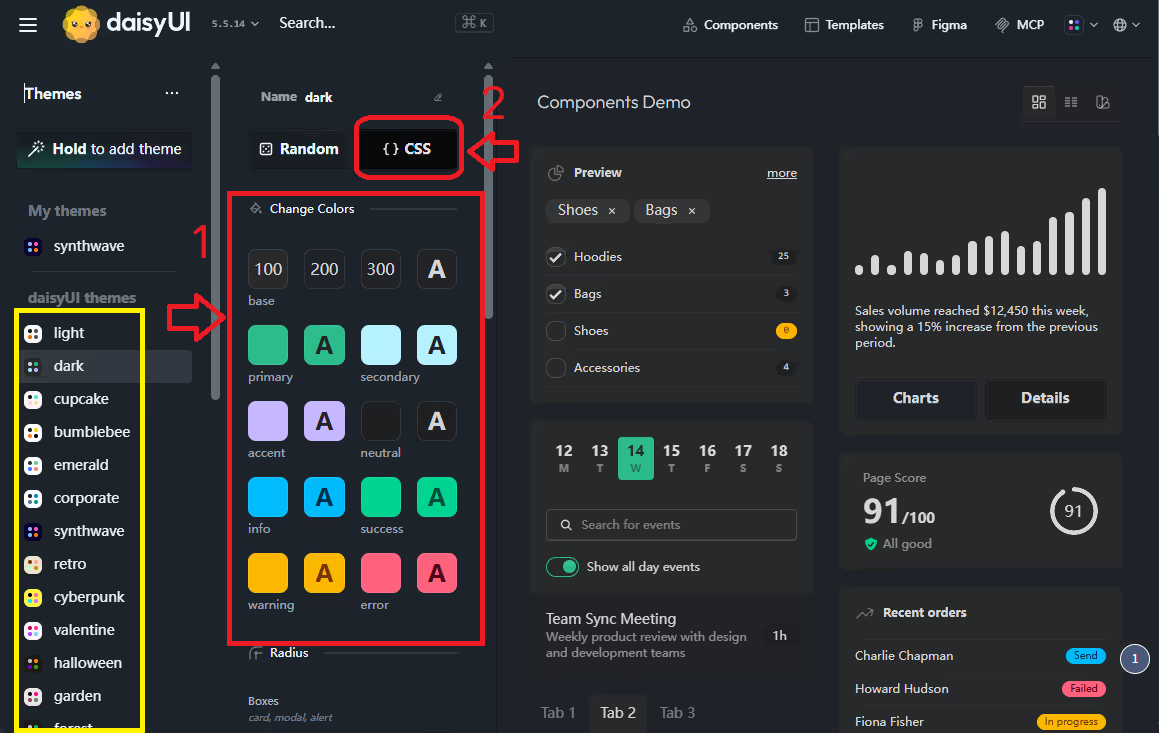
First, open the daisyUI Theme Generator.
As shown below, you can select a preset color scheme in the yellow highlighted section on the left, then customize colors in the red highlighted section in the middle.
After customization, click the CSS button at the top.
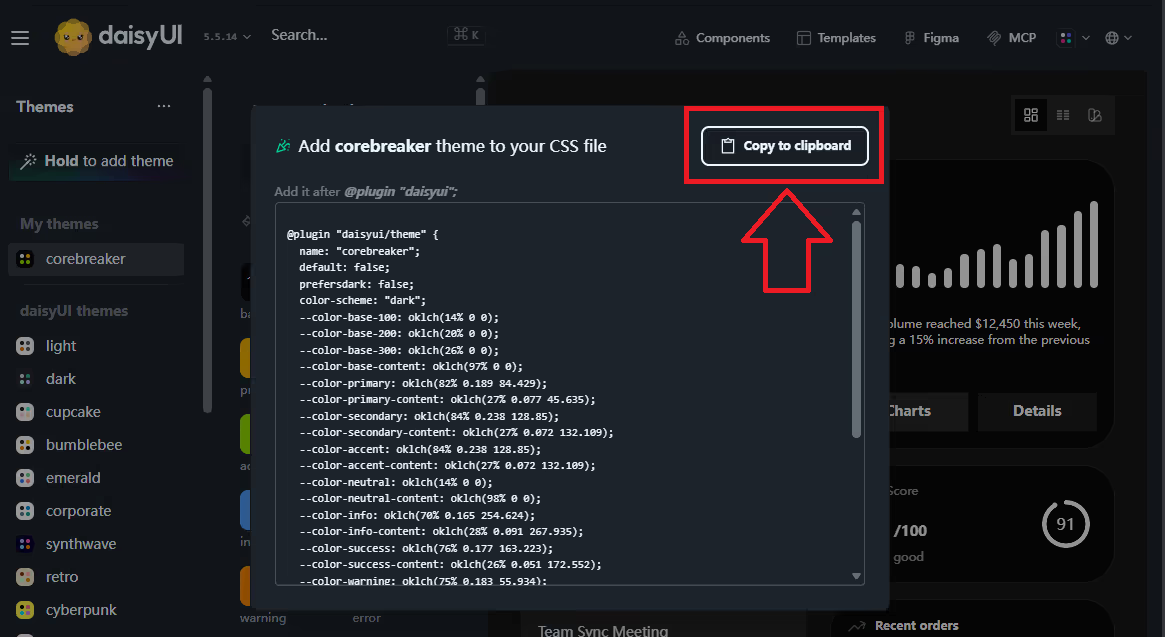
A dialog will appear as shown below, click the Copy to clipboard button in the upper right to copy your color scheme to the clipboard.
Paste your color scheme in the input box below:
Add Custom Color Scheme
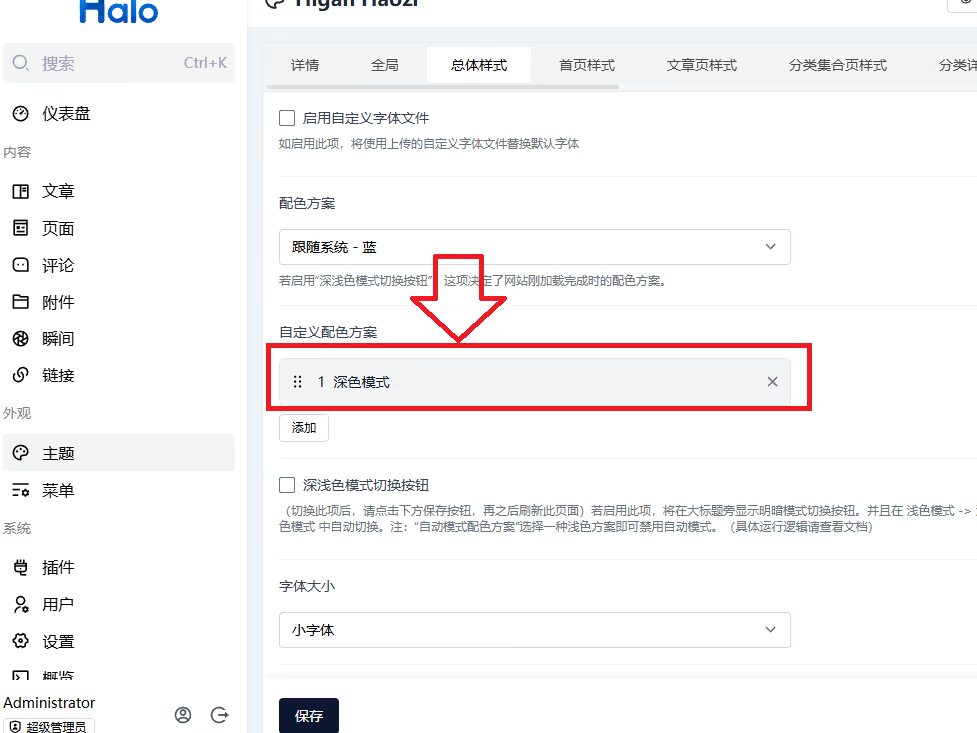
Navigate to the "General Styling -> Custom Color Scheme" configuration item. As shown below, click the add button:

In the popup window, click CSS Variable Mode to enable it. Then click the submit button.
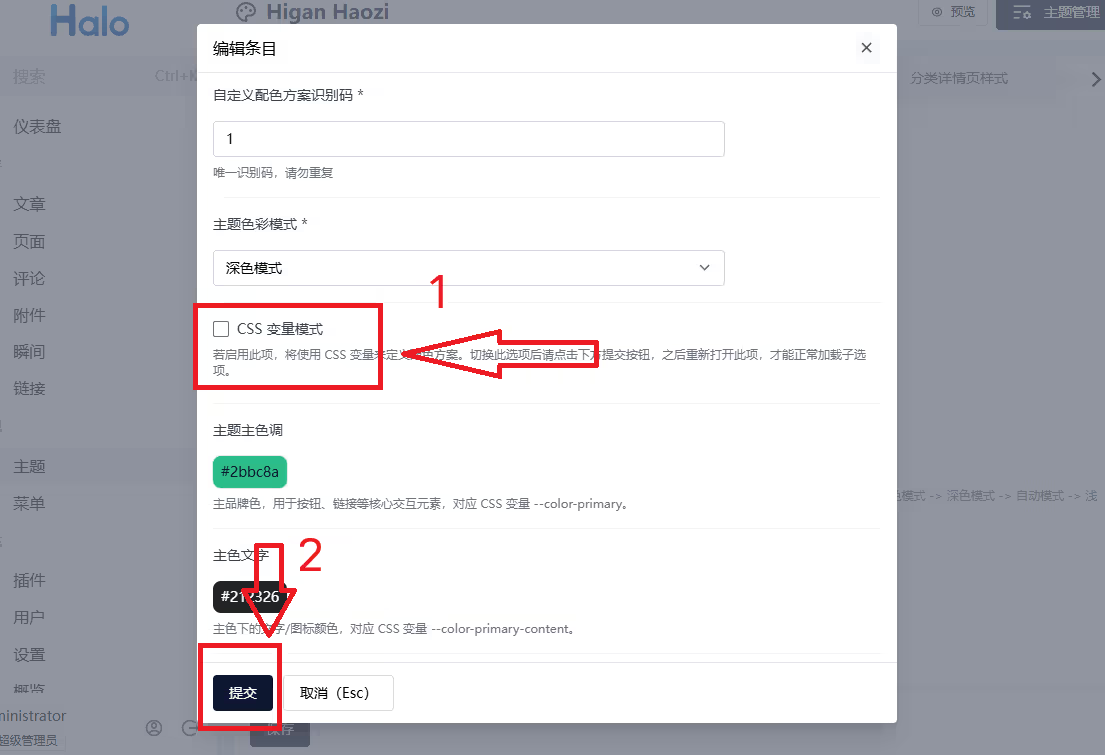
Click the newly created color scheme:
First, select your theme color mode in the red highlighted section at the top. Then paste the CSS variables you just parsed in the red highlighted section below. Finally, click the Submit button at the bottom.

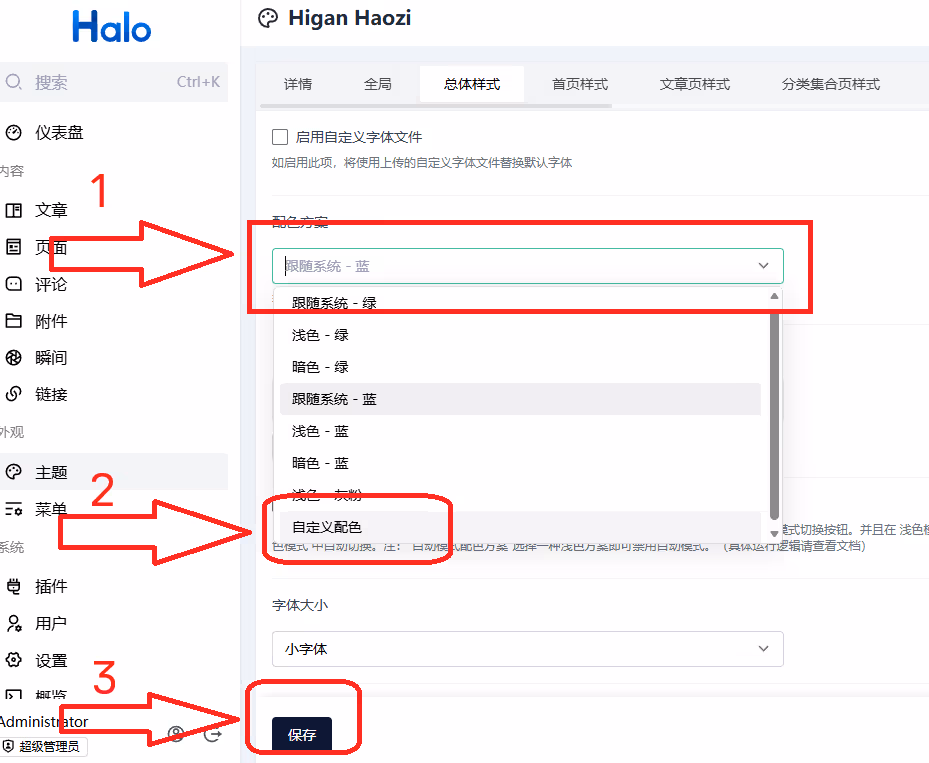
Apply Custom Color Scheme
As shown in the image, select Custom Color for the color scheme, then save.
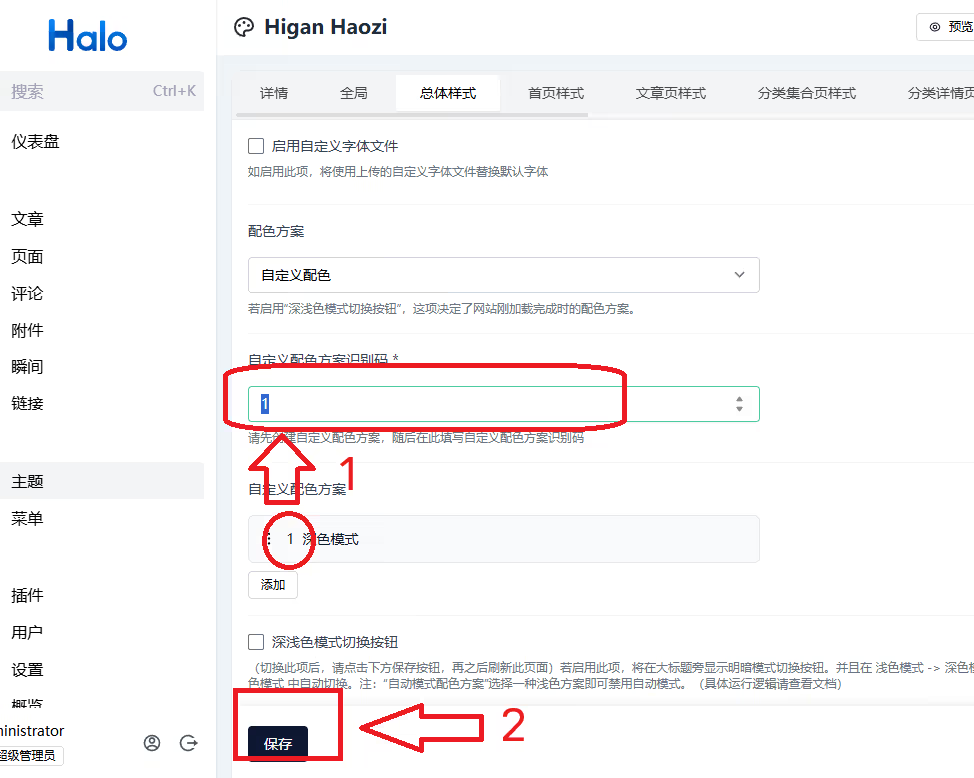
In the newly appeared Custom Color Scheme Identifier configuration item (if this item doesn't appear, try refreshing the page), fill in the identifier for your custom color scheme. Finally, click the Save button at the bottom.
Congratulations! You have successfully customized your color scheme and can now enjoy the wonderful experience of a personalized theme! 🎉